GNAT with Geany IDE
Previous tutorial GNAT Projects
Why you need the Geany IDE
One you have a large project or even a project with multiple source directories containing many source files your going to need a debugger. A debugger allows you to stop the program at a particular point and then go through the program execution line by line to see what is happening. It's almost impossible to write large programs without a debugger and it needs to be integrated with a text editor.
This is what is called an "Integrated Development Environment". Geany or GNAT Studio are two such environments. My preference at the moment is for Geany because it is simple to use and relatively bug free and AdaCore have announced that they will no longer be supporting GNAT Studio in preference for something called Alire.
(My initial investigations into Alire I was unable to create a simple hello world and so I gave up. My preference is for clear concise things that work over the latest gimmicks. At the same time as criticising AdaCore for there seeming lack of concern for how to use the software they produce I must also praise them for some of the best text books on ada that are available today. See the AdaWorks resources page which links to they fine work they promote.)
Anyway we will see if I feel the same way about Geany after using it for six months but it looks good on my 3000 hour Ada webserver project with at least 50 source files. That is the ada program that runs to bring you this and many other websites of mine today.
Geany focuses on simplicity rather than bells and whistles.
YOU MUST COMPLETE Example 5 in the last tutorial before you carry on!
Installing Geany
You can take a look at www.geany.org for installation instructions for windows and mac as here I cover only Linux.
Open the terminal to create a directory for this example and make sure its the working directory. You type only the text shown in
[john@silver ~]$ cd ~/prog/ada
[john@silver ada]$ mkdir exa4
[john@silver ada]$ cd exa4
[john@silver exa4]$
Your linux OS is going to use just one of these two commands, either;
[john@silver ~]$ sudo dnf install geany-*
or
[john@silver ~]$ sudo apt install geany
follow through the installation instructions.
Installing Geany Plugins
You then also must install the extensions so you get the debugger. If your not using Linux take a look at Plugins for Geany otherwise your linux OS is going to use just one of these two commands, either;
[john@silver ~]$ sudo dnf install geany-plugins-*
or
[john@silver ~]$ sudo apt install geany-plugins
Again follow through the installation instructions.
Start Geany
Before we start, I am relying on you still having your example 5 in a directory ~/prog/ada/exa5 so if it isn't there please recover it from the last tutorial.
When your sitting comfortably let us begin...
You should find Geany on the desktop menu. something like Applications>programming>Geany or Menu>programming>Geany Editor. so you don't need to start it from the terminal. Once started you see a window like below, this is your Geany Workspace.
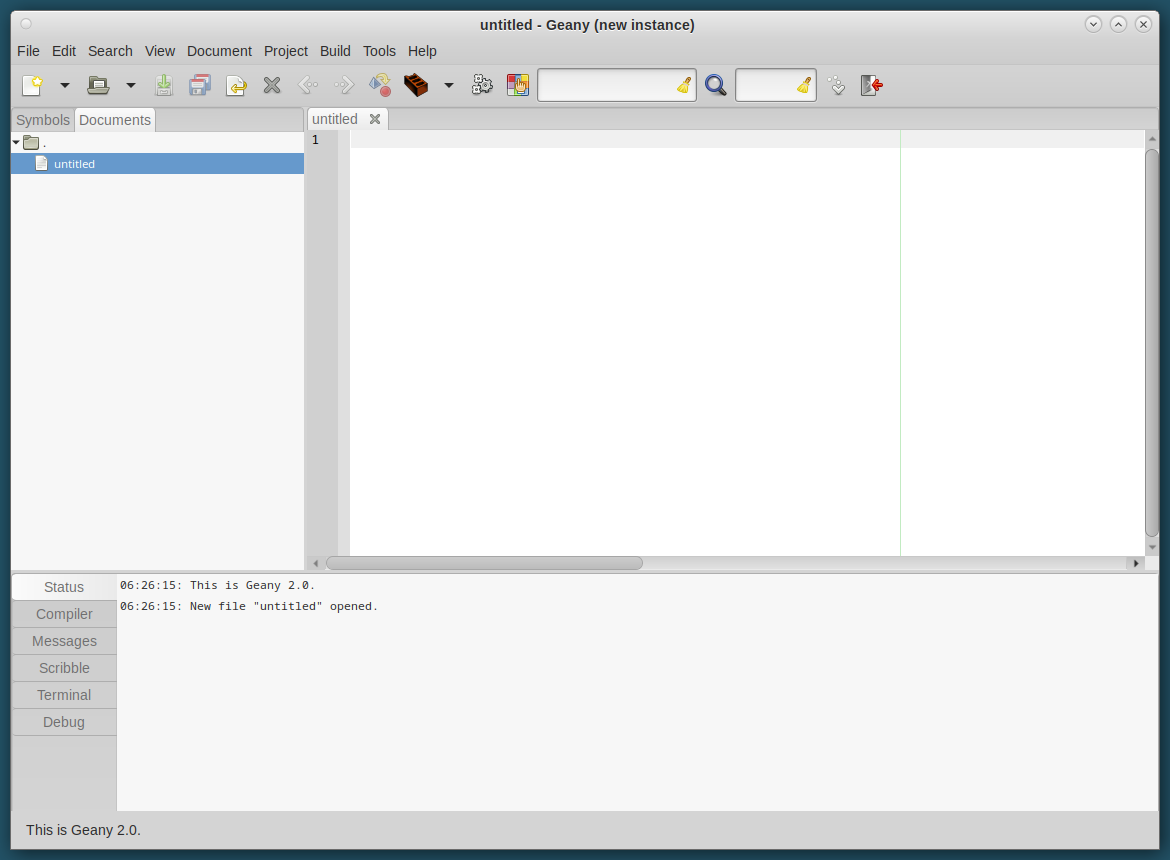
The workspace has the following parts:
- The menu at the top
- below that the "toolbar" full of icons and things
- then below left the "side pane" with two tabs. Symbols and Documents
- right of that the "editor pane" which has a tab at the top for each document you have open (at the moment "untitled")
- then below those is the "Message pane" with a number of tabs to it's left
- and finally at the very bottom of the window is a "status bar" in which many interesting things can appear.
Most of these can be configured in the Interface preferences, the View menu, or the popup menu for the relevant pane. You can find more information about this in the the Geany Manual later if you need it.
Now Geany is running we need to do a bit of configuration to set it up to work in Ada.
(1) Switch on the debugger
Open the menu "Tools" and click on "Plugin Manager", a "Plugins" window opens and if you scroll down you can find "Debugger" and put a tick in the box to the left of it, then close the window. If you do not find "Debugger" it is likely that you didn't manage to install the plugins correctly, see above.

(2) Create Your Project
Open the menu "Project" ...
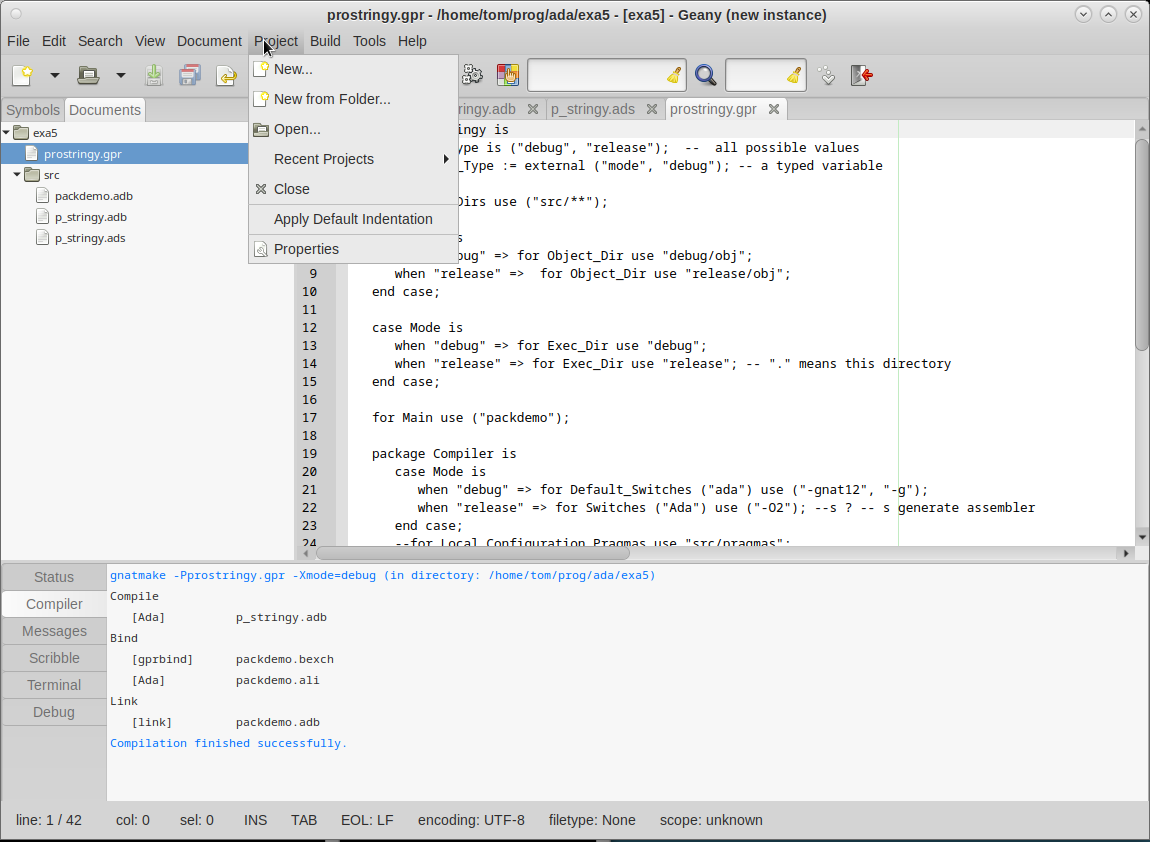
...and click on "New from Folder...", a window opens titled "Select Project Base Path" where you now need to choose "exe5" and then click "Open" on the bottom right. Another window opens titled "New Project".
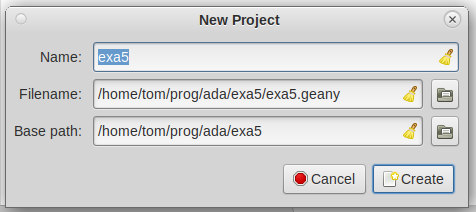
Geany is going to create its own project file in your project directory for including it's own information but take a look at these fields and understand them, but don't change them, and click "Create".
Now drag and drop the prostringy.gpr in exa5 into the "editor pane" and it should look something like this;
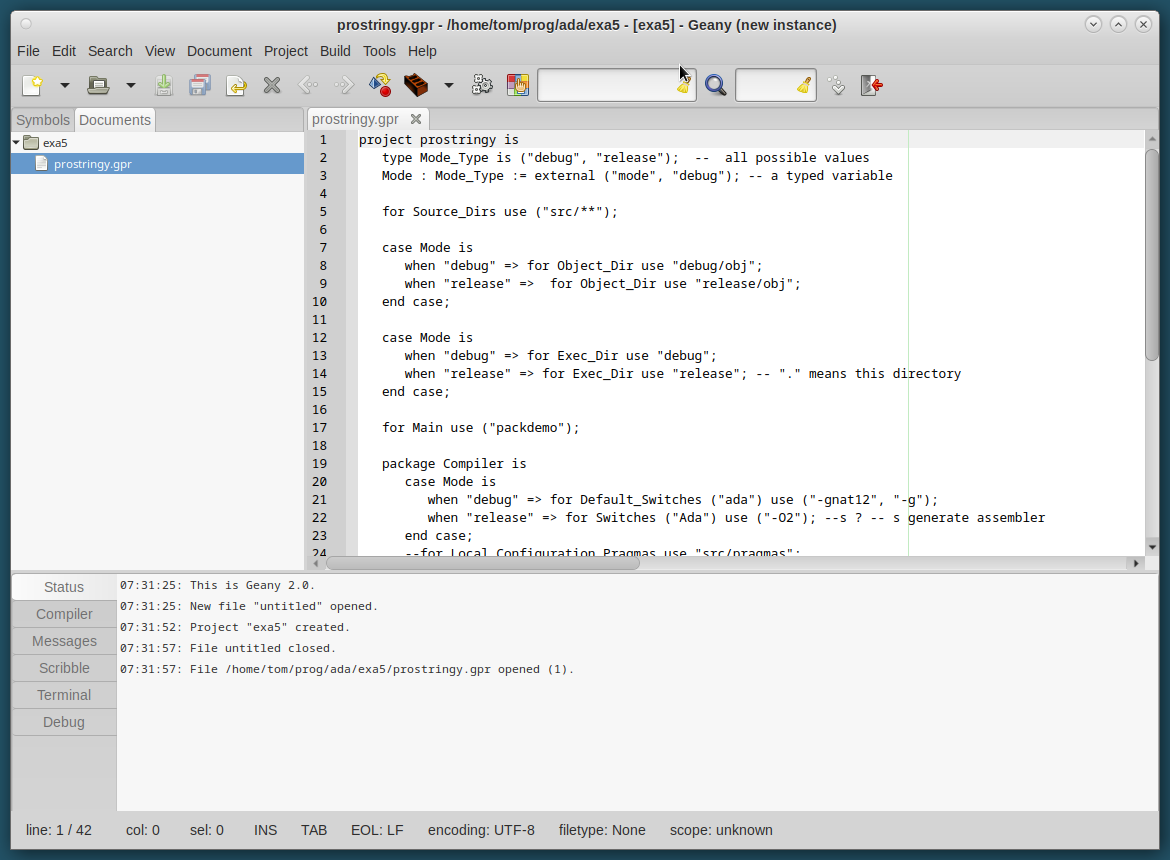
Although you can drag files to the editor pane, where the text will appear, they will also appear, by name, in the side pane under the "Documents" tab.
(3) Set the Build Commands
In the editor pane CLICK ON THE TAB FOR prostringy.gpr , THEN...
Open the menu "Build" and click on "Set Build Commands", a window opens. If your not on the "Build" tab in the window then click on it and you should see something a bit like this. This image is after I have changed it!
DANGER THIS IS AN OLD IMAGE SO NOW REPLACE "gnatmake" WITH "gprbuild" AND EVERYTHING SHOULD WORK. IF NOT SEND ME AN EMAIL TITLED "ADAWORKS.IT ERROR" PLEASE PLEASE PLEASE.
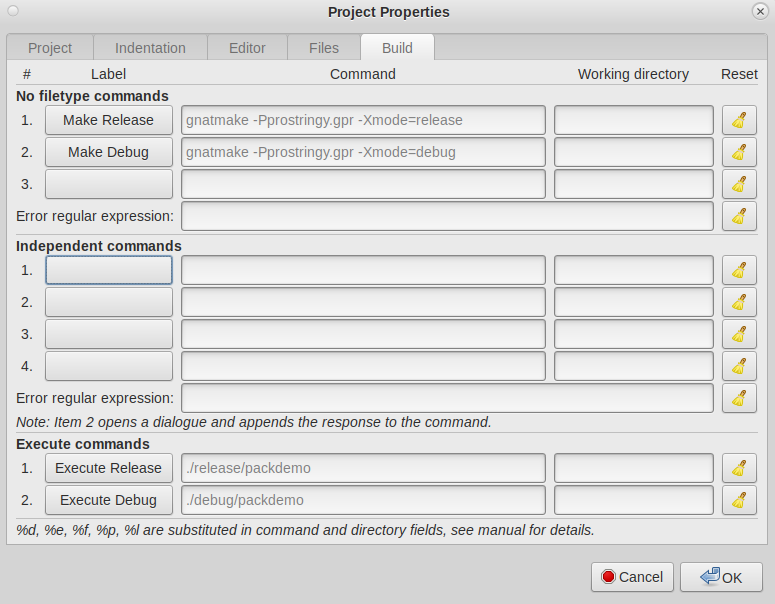
This is where you enter the commands that you would normally type in order to make (that means compile and link) the project.
Remember in the previous tutorial we used these commands to make our debug and a release versions of the code;
[john@silver exa5]$ gprbuild -Pprostringy.gpr -Xmode=debug
[john@silver exa5]$ gprbuild -Pprostringy.gpr -Xmode=release
and then we used;
[john@silver exa5]$ ./debug/packdemo
[john@silver exa5]$ ./release/packdemo
to execute the executable files we created.
In the above window, clicking on the command buttons on the left allows you to edit their function or clear them using the yellow brush icon, and then you can edit or clear the command its self in the second column, form entry field.
Lastly the third column is a working directory column which we won't use yet. It is used when the current directory needs to be set to something while the command is executed. Some programs will write or read files to or from the current directory when the command executes.
So set up your fields to look like the above then you can click on "OK" on the bottom right.
(4) Build and Execute
ALWAYS MAKE SURE YOU ARE STILL ON THE TAB FOR prostringy.gpr IN THE EDITOR PANE before you build or execute
Open the menu "Build" and click on "Make Release" and the Geany IDE will make the release executable.
Open the menu "Build" and click on "Execute Release" and the Geany IDE will open an extra window in which you can see the results of the execution.
Now you can do the same thing for the debug verion, first make it then execute it.
(5) Syntax errors
Now I propose we see how Geany deals with errors in the program.
Now drag and drop the source files in exa5/src into the "editor pane" and and they should appear for editing just as prostringy.gpr did.
In the editor pane click on the tab for p_stringy.adb , and mess up the code slightly by changing the first occurrence, on line 16, of the word "loop" to "lop" for example, and then SAVE THE FILE!!
Then in the editor pane CLICK ON THE TAB FOR prostringy.gpr,
then open the menu "Build" and click on "Make Release" and the Geany IDE will try again to make the release executable. In the message pane you will see that it ends with the message "Compilation failed" which is what we expected.
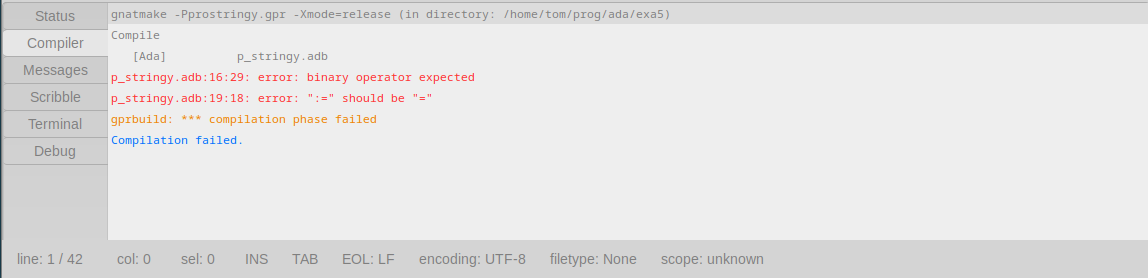
The errors appear in red above and it is always the first error one should look at first. This is because often later errors are a consequence of the first error.
We see it is in the file p_stringy.adb so click on the tab for that file on the editor pane or click on the icon for that file in the side pane, then double click on the red error line on the message pane again and Geany underlines in red the code on the editor pane so you can see the problems.
As usual compilers don't always make the problem totally clear so your going to have to use your intelligence as well to see the word "lop" that should be "loop".
This time it was easy because we caused the problem but it isn't always that simple. Of course it is made a lot easier because our Intergrated Development Environment IDE highlights the problem in our editor onthe text it's self.
Try introducing some other syntax errors, one at a time and see how it informs you of them.
(6) The debugger
Before I mentioned the debugger and how we can step through the code one instruction at a time.
First if you haven't already then lets compile the debug version.
ALWAYS MAKE SURE YOU ARE STILL ON THE TAB FOR prostringy.gpr IN THE EDITOR PANE before you build or execute.
Open the menu "Build" and click on "Make Debug" and the Geany IDE will make the debug executable.
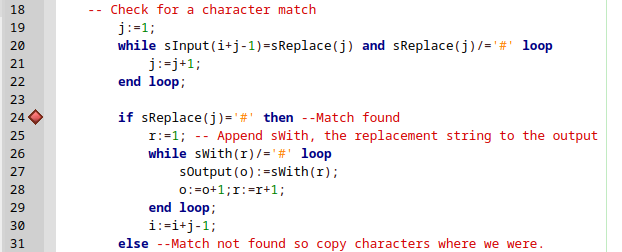
On the editor pane click on the p_stringy.adb tab.
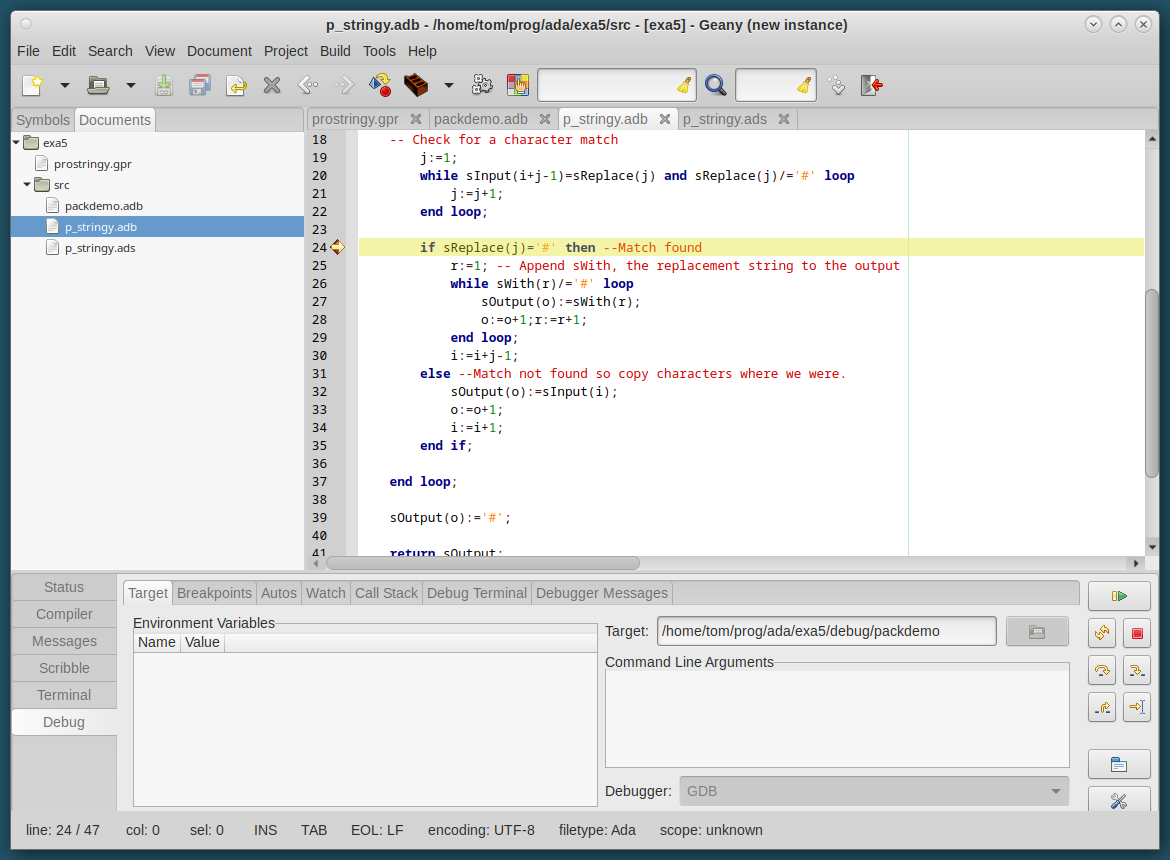
Let's put a breakpoint on line 24. Click just to the right of the line number and a red diamond should appear. This indicates that a breakpoint is set.
Look down to the message pane and on the left is a Debug tab. Click that then there are more tabs at the top of the message pane. The first is the "Target" tab. Click on that and the pane look like this.
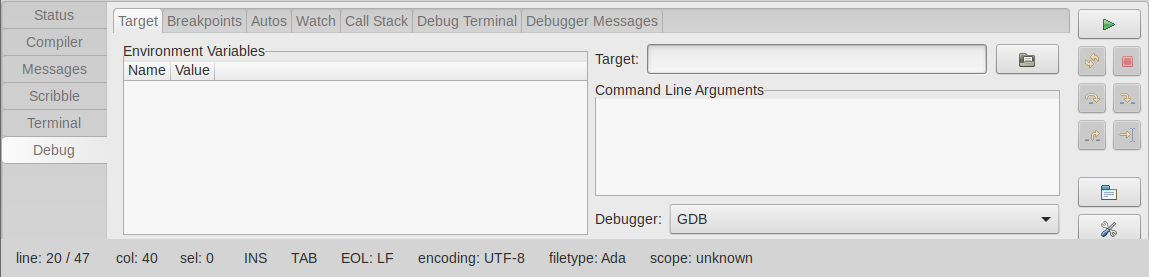
There is a field called "Target" and and on the right of that is a directory icon which if you click on it you get the file selector. Select the debug executable file.
Now in the message pane on the right top there is the green triangle play button. Press that and the code runs. Stopping at the breakpoint. The yellow line and yellow arrow on the left show the next instruction that will be executed.
Now you have choices as to what to do next using the buttons on the bottom right. Hover over a button with the mouse to see what it does.
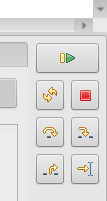
- Execute - Start or continue execution until the next break point
- Restart - obvious.
- Stop - Stop the program
- Step over - execute this instruction, function or procedure and then break again
- Step into - step into this function or procedure and then break again
- Step out - step out of the current function or procedure and then break again
- Run to cursor
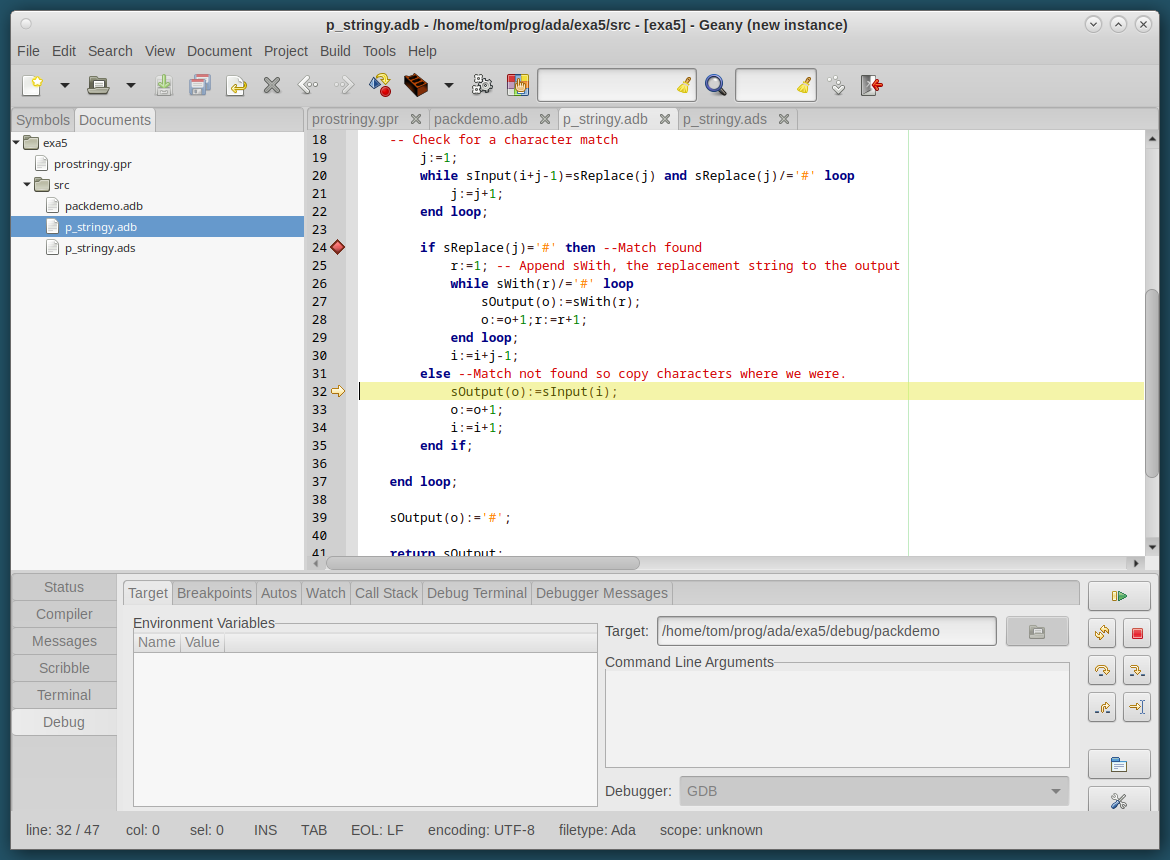
Let's choose "Step over" This will execute the instruction and the yellow arrow advances to point to the next instruction to be executed.
I am not going to explain any more of Geany here as there is a great deal online. A seach for "Geany debugging" should give you a lot of material though it is very likely to focus on C or C++ rather than Ada but the debugging in principle i the same.
I hope I have pushed your boat out from the quay and that know with the help of the internet you can sail and produce some really good large Ada programs. Good Luck my friends.
Take a look at the Geany website and the the Geany Manual