Previous tutorial Starting GNAT
GNAT Starting Ada
These instructions are for installing and starting programming using "GNAT" on a MacBookPro computer.
Computer
They have been tested on a MacBookPro computer with macOS Mojave;
- macOS Mojave version 10.14.6,
The computer had;
- Intel Core i5-5257U 2 Core CPU
- 8 GiB of memory
- 121Gb SSD.
It is expected that the instructions here will work on a far lower specification machine.
The text editor that comes as default is Pluma and this was used.
Installing The GNAT Ada Tools
We googled "GNAT on MAC" in order to find these two links which you can click on:
OSDN

Source Forge
We downloaded the package file;
gcc-11.1.0-x86_64-apple-darwin15.pkg
from the OSDN link by clicking on the "gcc-11.1.0-x86_64-apple-darwin15.pkg" link on that page.
It's possible that you may find a later version of this package file. For example we know of an earlier package named "gcc-4.8.1-x86_64-apple-darwin12.pkg" that we did not use. If you find a later version then don't forget to change the commands below to refer to that later version.
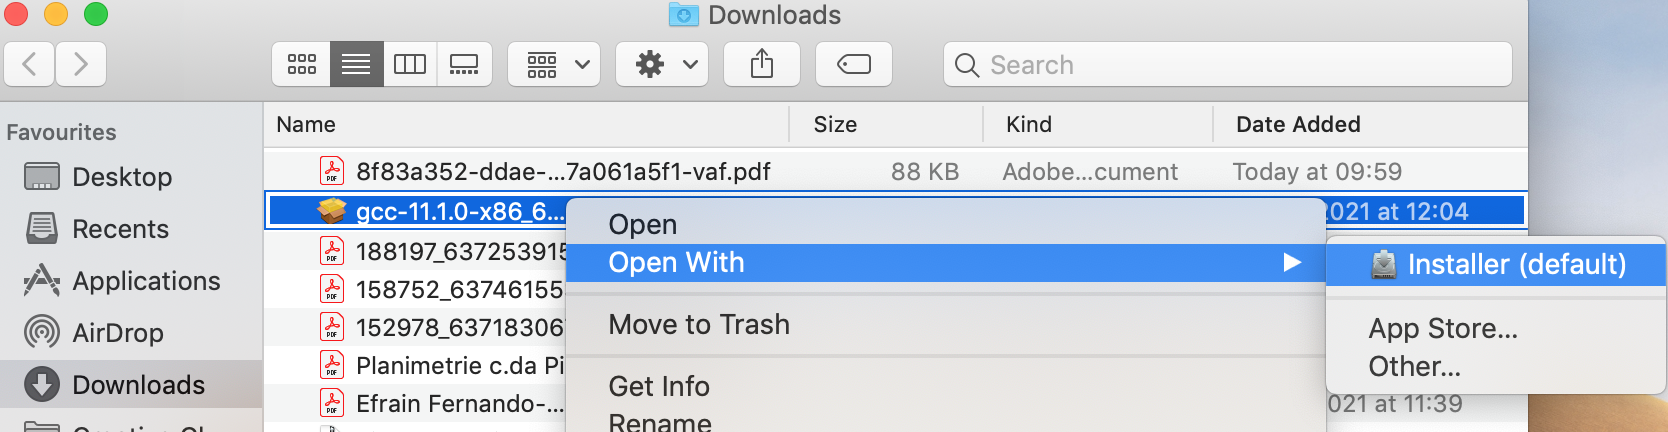
The package file downloads to the download folder. Right clicking on the package file, for the menu choose "Open with", "Installer"
The installer starts with this warning;
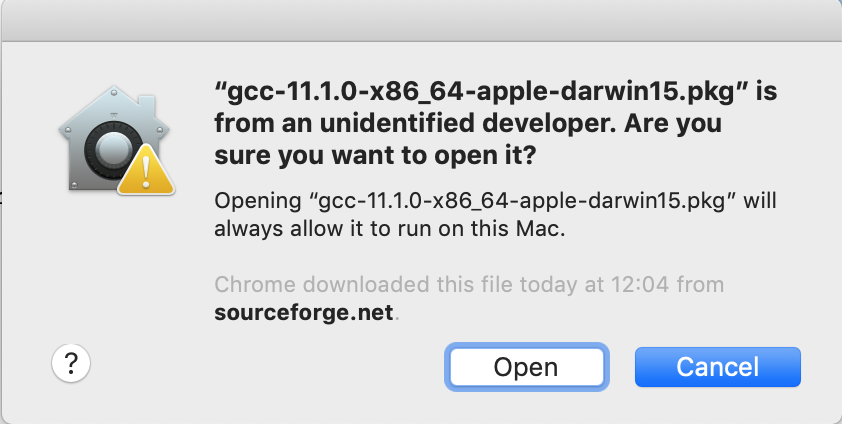
but ignore it and click on the "Open" button. You get;
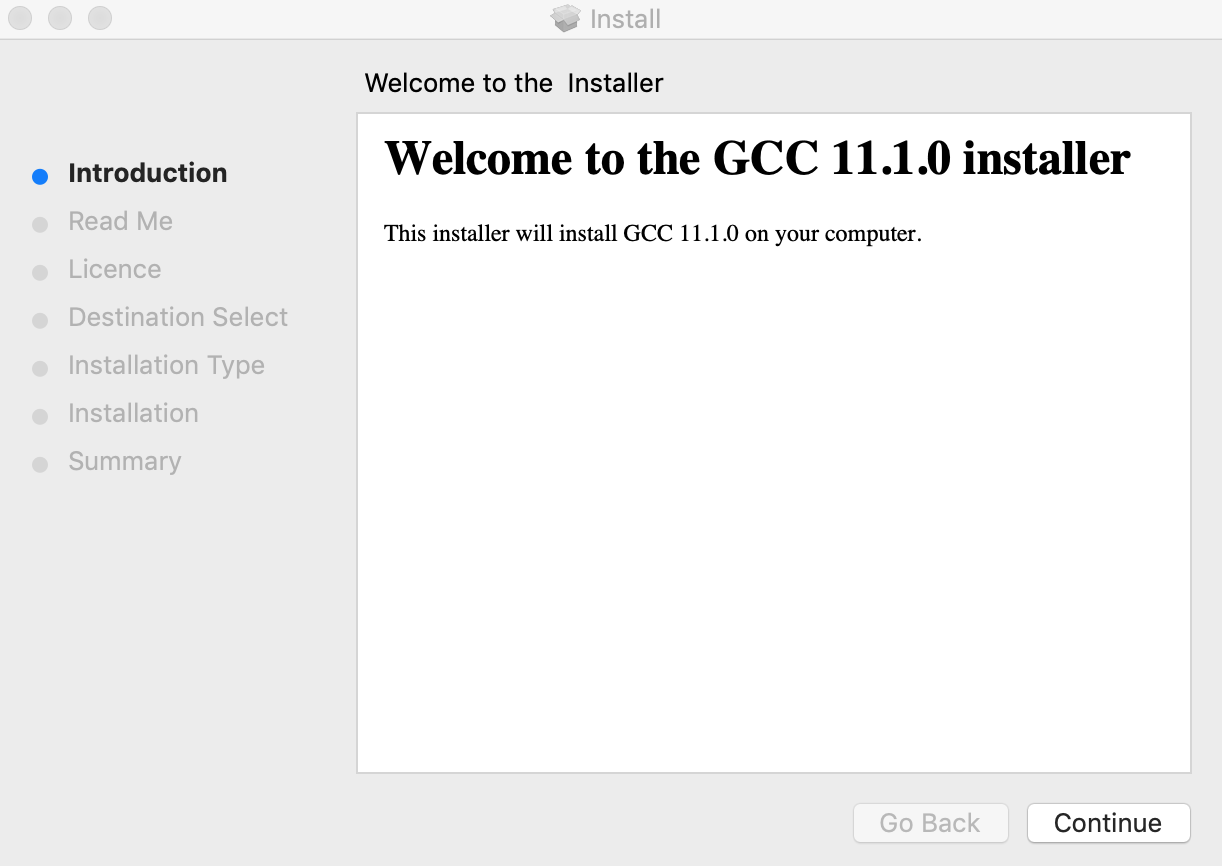
and after some time you are told that the software is installed.

So you can click on "Done". However we also got a dialogue asking us to install command line developer tools;
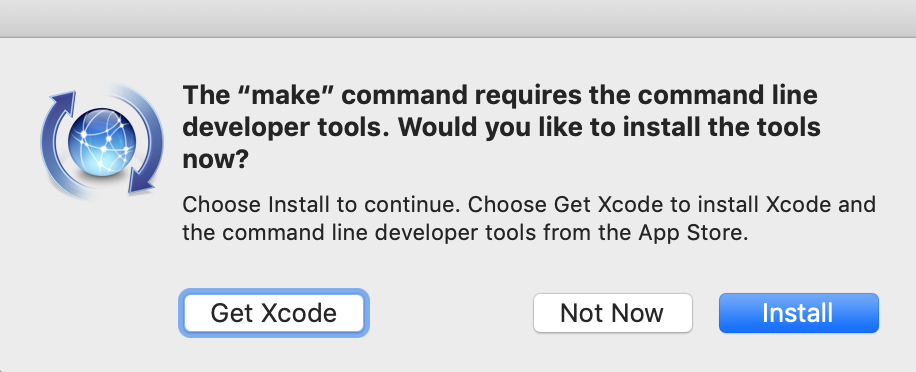
We responded by clicking "Install" to this and then a little later the installation failed with the message;
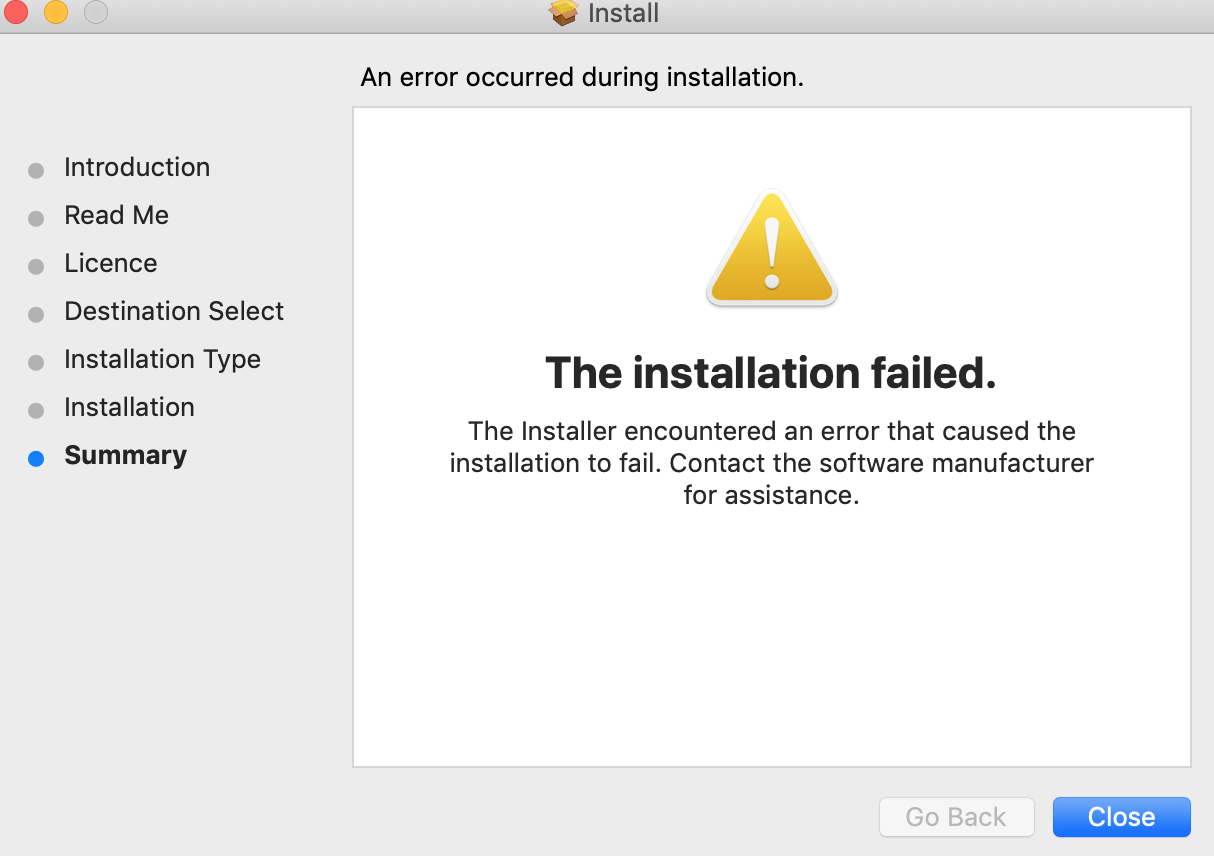
The good news is that it appeared to make no difference! So just carry on!
Using The Tools
Using the Terminal
Before WIMP operating systems (Windows Icons Menus Pointer) like the computer desktops on Linux, Mac and Windows computers, most computer work was done through a terminal or Teleprinter. This approach is sufficiently useful that all three WIMP operating systems have a terminal emulator where commands can be typed in and the computer can respond.
To open a terminal do one of the following:
- Click the Launchpad icon in the Dock, type Terminal in the search field, then click Terminal.
- In the Finder , open the /Applications/Utilities folder, then double-click Terminal.
In order to help you use the terminal the following notation is used on this website.
Text written by the computer is shown in
MacBook:~ john$
Text you should type at the prompt on the terminal is shown in
Other computer code such as programs are shown in this style.
Here the computer prompt is for a user called "john" and a computer (host) called "MacBook" your user name and host name will most likely be different.
Create a Working folder
When programming it is good to have a folder for your programming activities and one sub-folder for each language. You can create folders using the terminal. You type only the text shown in
MacBook:~ john$ mkdir prog
MacBook:~ john$ cd prog
MacBook:prog john$ mkdir ada
MacBook:prog john$ cd ada
MacBook:ada john$
Now you have a working folder for all your ada programming and your Current folder (cd) is now called "ada".
The PATH Variable
When you open a terminal and you want to program in ada you will need to let the terminal know where to look for the ada tool programs. You do this as follows. You type only the text shown in
MacBook:~ john$ export PATH=/opt/gcc-11.1.0/bin:$PATH
Which tells the terminal to also look for commands in the folder /opt/gcc-11.1.0/bin That is where all the GNAT commands are. You should do it when ever you open a terminal to start working on Ada. You can check your folder has been added to the PATH with;
MacBook:~ john$ echo $PATH
/opt/gcc-11.1.0/bin:/usr/local/bin:/usr/bin:/bin:/usr/sbin:/sbin:/opt/x11/bin
You have now added the folder containing the gcc commands "/opt/gcc-11.1.0/bin" to your path variable.
Your Mac looks in each of the file paths in PATH for any command you type at the keyboard. Type;
MacBook:~ john$ gnatmake
and the computert should give you a list of help for the gnatmake command don't read that now. If you get the message "-bash: gnatmake: command not found" it has not installed correctly and sadly I am not sure why and you are stuck!
Otherwise type;
MacBook:~ john$ cd ~/prog/ada
MacBook:ada john$
to make sure the ada directory is your current directory.
Your terminal is now ready for use.
Using the Editor
Computer programs are written as text just like books or files of information. In order to write or edit a program you use an app called an editor which is really just a word processor for writing programs or even just plain text notes and things.
On the Mac, to open TextEdit on the desktop menu select Go>Applications>TextEdit, a dialogue opens, on the bottom left click on the "New Document" button. You might prefer to use another text editor if you have one but TextEdit will do for now. You will be using TextEdit or your preferred text editor to type or edit all programs you write.
Example 1: Hello World
Open the terminal to set up the command path and create a directory for this example and make sure its the working directory. You type only the text shown in
MacBook:~ john$ export PATH=/opt/gcc-11.1.0/bin:$PATH
MacBook:~ john$ cd ~/prog/ada
MacBook:ada john$ mkdir exa1
MacBook:ada john$ cd exa1
MacBook:exa1 john$
Use TextEdit or your prefered text editor to type or copy the following;
with Ada.Text_IO;
procedure hello is
begin
   Ada.Text_IO.Put_Line("Hello world!");
end hello;
then save it in the exa1 directory as hello.adb You are now ready to compile it. Type;
MacBook: exa1 john$ gnatmake hello.adb
gcc -c hello.adb
gnatbind -x hello.ali
gnatlink hello.ali
MacBook: exa1 john$
Typing
MacBook: exa1 john$ ls
hello
hello.adb
hello.ali
hello.o
MacBook: exa1 john$
and that the file "hello" is an executable program. Let's execute it. Type
MacBook: exa1 john$ ./hello
Hello world!
MacBook: exa1 john$
It executes and prints
Example 2: What is your name?
Open the terminal to set up the command path and create a directory for this example and make sure its the working directory. You type only the text shown in
MacBook:~ john$ export PATH=/opt/gcc-11.1.0/bin:$PATH
MacBook:~ john$ cd ~/prog/ada
MacBook:ada john$ mkdir exa2
MacBook:ada john$ cd exa2
MacBook:exa2 john$
Use TextEdit or your prefered text editor to type or copy the following;
with Ada.Text_IO;

procedure helloname is
   s: String(1..16);
   n: Integer;

begin
   Ada.Text_IO.Put_Line("Hello, what is your name?");
   Ada.Text_IO.Get_Line(s,n);
   Ada.Text_IO.Put("Hello ");
   Ada.Text_IO.Put(s(1..n));
   Ada.Text_IO.Put(" your name is");
   Ada.Text_IO.Put(n'Image);
   Ada.Text_IO.Put(" characters long, including spaces.");
end helloname;
then save it in the exa2 directory as helloname.adb You are now ready to compile it. Type;
MacBook: exa2 john$ gnatmake helloname.adb
gcc -c helloname.adb
gnatbind -x helloname.ali
gnatlink helloname.ali
MacBook: exa2 john$
Typing
MacBook: exa2 john$ ls
helloname
helloname.adb
helloname.ali
helloname.o
MacBook: exa2 john$
and that the file "helloname" is an executable program. Let's execute it. Type
The program runs printing;
Hello, what is your name?
Respond by typing your name i.e.;
John
And press the
Hello John your name is 4 characters long, including spaces.
The way Ada handles strings of characters is different from many other languages including C.
Ada's built in String type is is a way to declare an array of a certain fixed number of characters
(This is much safer than C/C++ zero terminated strings) but it is necessary to use the expression s(1..n)
to make sure we only output using "Put" the number of characters that were actually input using "Get".
This program can be made more readable like this;
with Ada.Text_IO; use Ada.Text_IO;

procedure helloname is
   s: String(1..16);
   n: Integer;

begin
   Put_Line("Hello, what is your name?");
   Get_Line(s,n);
   Put("Hello ");
   Put(s(1..n));
   Put(" your name is");
   Put(n'Image);
   Put(" characters long, including spaces.");
end helloname;
Here the addition of use Ada.Text_IO; at the start, saves keep typing Ada.Text_IO. before every Put, Put_Line or Get_Line in the program.